
Welcome to the second in our three part series on the tools that the Pirate Viking Painting Studio (I.E. me!) comes equipped with, today... Painting:

When painting there is one obvious tool you cannot do without (unless you are five and using your fingers) and that is good brushes:

I certainly haven't shown all of the brushes that I own. I have old brushes relegated to glueing and weathering duties, brushes designed for drybrushing, brushes that I don't mind getting enamel paints and turpentine on. But these are my workhorses. They are Raphael brand brushes available from Jackson Arts in the UK and Secret Weapon Miniatures if you are in the States. These really, really are not cheap brushes. Each will set you back at least £5. This is one case where I cannot recommend being thrifty. There are some things that you have to buy the very best that you can afford. These aren't the only premier brushes out there. A lot of people swear by Winsor and Newton Series 7. Experiment and find your niche. The key elements are:
- Kolinsky Sable: Sable is the sort of Russian weasel that the best brush hair comes from. The Kolinsky Sable is only taken from the tip of the tail where it naturally tapers.
- A decent reservoir: The biggest error I hear novices make is saying "wow that is detailed, you use a brush with like one hair?". No, I don't, most of my painting is done with a size 0 brush. Highlights are with a 3/0. Eyeballs with a 5/0. You need the hair in the brush to hold paint in the belly of the brush ready to be fed to the tip of the brush like a fountain pen. A good brush will have a point so fine you struggle to measure the thickness of the line.
- The Test: Before you buy it (or before you use it if you buy online). Take the cover off, moisten the back of your hand and draw the brush along it. Does the hair split into a fishtail? Is there a rogue hair sticking out? Does it curl at the tip? If the answer to any of these is "yes" then reject the brush. You are paying £5 for a stick with some hair at the end. Make sure that you are getting the craftsmanship you deserve for the price.
 |
| Left to right: Master's Brush Cleaner; Turpenoid; W&N Brush Cleaner |
So, once you have bought your elite, designer brushes you want to care for them right? Brushes are made of hair, your hair needs washing and conditioning to get the best results right? The first and most obvious form of brush washing is water:

Two pots of water in fact. One for metallic paints, one for normal paints. The reason for this is that the metallic paints are made with flecks of aluminium to make them shine. This turns into a suspension in the washing water. Looks beautiful but leaves tiny flecks of metal on random bits of your model from then on. Incidently the next time Vistaprint offer me a free mug I am getting this one:

Heh, heh! After each project though I give the brushes a bit of tlc. I use the Masters Brush Soap to clean out all the little clinging particles of paint from the brush. Then roughly once a month or so they go for bath in Winsor and Newton Brush Cleaner and Restorer. Note the dark colouration. This shouldn't happen! I foolishly let the handles sit in it and it stripped the paint from them too! Trouble with this product is it is really very harsh on the bristles. Strips all the natural oils from them. As a result they need conditioning. You can use regular hair conditioner for this but something in my mind rebelled against this so I bought some Turpenoid brush conditioner. If you do this regimen then your brushes should be in tip-top condition for years. Put it this way. I use my brushes roughly 2-300% more than the casual hobbyist and they lasted a year and a half before I felt I needed to replace them.

So now we have a good brush we need a good surface to paint upon. Just as an artist prefers a prepared canvas we need to use primed figures. A mistake that novices - and mums of novices - always make is assuming that the spray paint is just a price fiddle. When you prime a model you are not just painting it black or white (or grey, some hobyists swear by grey). You are putting a tough layer of primer that has a bit of "bite" to the surface. Just as you sand a wall before painting it to allow the paint to grip so you also need to prime a model. The Testors paint at the front is actually a Matt varnish and the best one on the market in my opinion. Use this when you have finished a model to protect the paint. Only really necessary on metal models. The paint is tougher than the plastic or resin and so will not chip or scratch.

Finally! Some paint! My choice of paint for 22 years has been Citadel Acrylics. They are wonderful paints and are only getting better with the Foundation and Wash ranges. Forget the internets snootyness. These are brilliant paints.

They are not though the be all and end all. Citadel Acrylics are brilliant at highly saturated, bright colours with a strong tone. They don't do so well with the desaturated military look. Now given that I paint dark and grungey for the most part it shouldn't surprise anyone that I wanted this desaturated military effect! I found it in Vallejo's model colour range. Loads of shades, lots of them keyed to specific uniforms and camo schemes (English Uniform, German Camo Black Brown etc). I now use them a lot. They have their weaknesses. Their metallics aren't quite as good as the Citadel and it is advisable to use Vallejo Thinner medium with the water when thinning them down as they don't react as well to just the water. In consistancy they are quite tarry until thinned but the dropper bottles mean you don't have to gum up your brushes transferring it to the pallette. Oh yeah, Palletes!
A pallette is any suface that you can mix and thin paint upon. I use cheapo small white plates, but I have used tiles, tin foil all sorts. The key thing is that it must not be porous. Ceramic is easy to clean, tin foil can be tossed away at the end of the session. Don't waste money on expensive dimpled palletes. Those are for watercolours. Just buy a 10p plate.

Another Vallejo product that I have been using a lot is Inks. Now this may surprise the people who know me but hear me out. When washes came out they were so wonderful that I turned my back squarely upon the inks and swore never to use them again. Much, much later I discovered that they were the best tool for adding intensity to bright colours and for shading polished metalwork as they didn't dull the finish like a wash does. The key thing is to add Glaze Medium. Also available from Vallejo. This kills the high gloss finish, breaks the surface tension and stops the formation of tide marks. Essentially it turns an ink into a bright toned wash. Very useful but ONLY for the jobs that I have mentioned! Washes still win everywhere else.
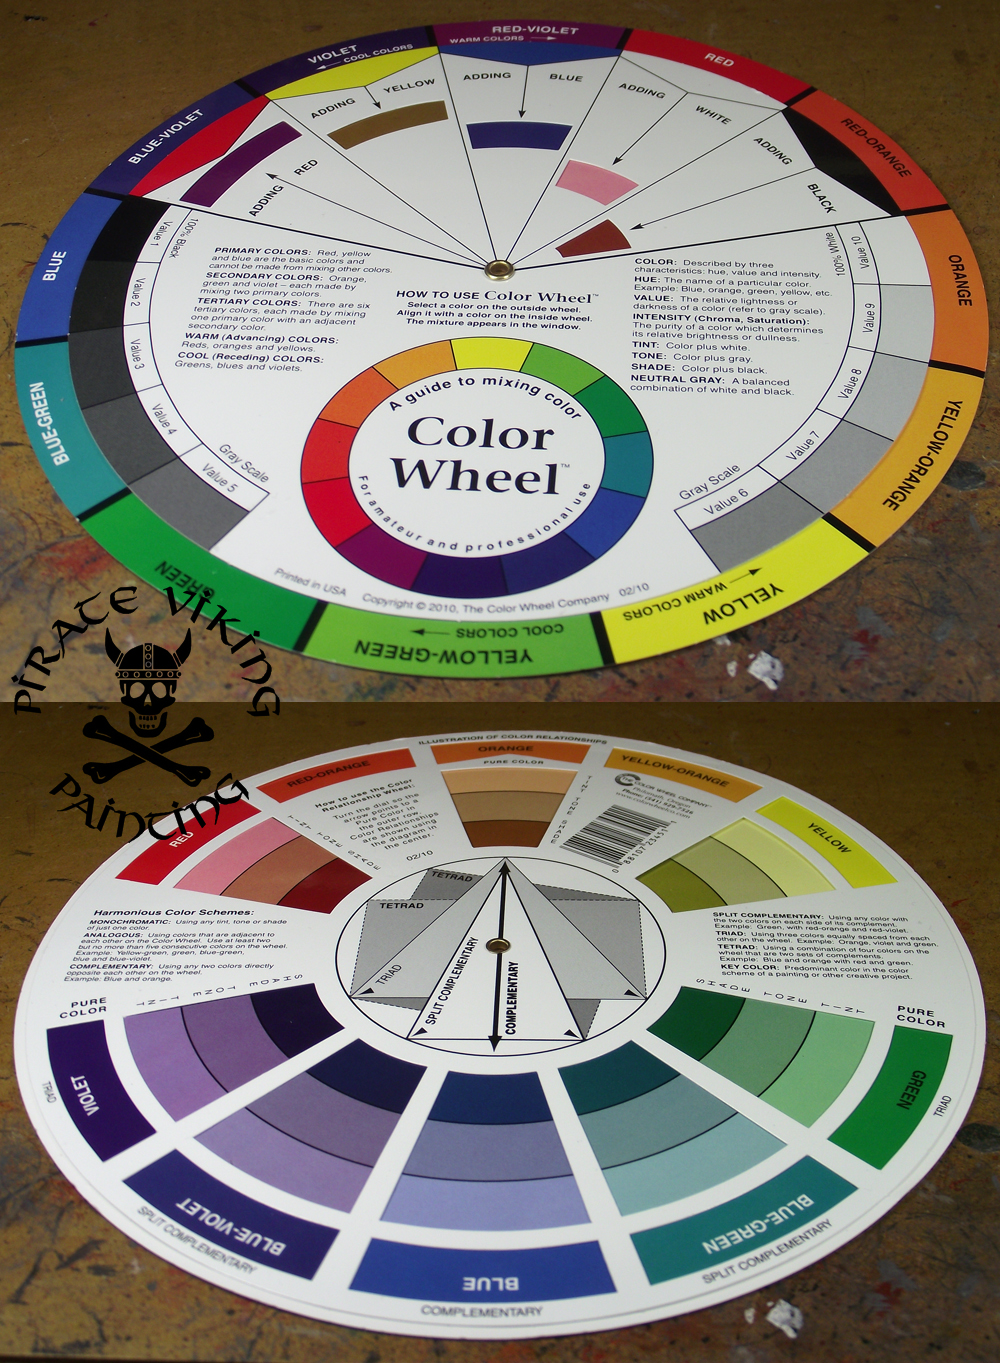
The last tool I want to talk about is my colour wheel. Artists tend to have this information plugged into their heads as naturally as breathing. Scientist types like me need to look it up! A colour wheel is the first stage of mastering colour theory (a massive subject for another time). This one rotates, shows complimentary, contrasting and discordant shades, effects of adding one colour to another and the different hues and shades that work together. I got from Jackson Arts but they are everywhere. They really, really help with the designing of colour schemes.
And so we come to the end of part 2! Part 3 will be on finishing, weathering and basing. Until then:
TTFN
No comments:
Post a Comment